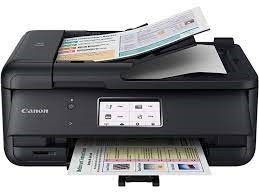
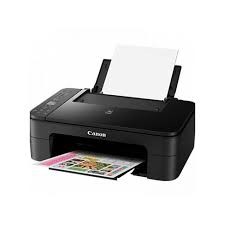
Canon Printers are becoming more popular, and many people are utilizing them to do numerous jobs with a single printing machine – a printing machine that can do everything from copying to scanning to faxing to printing. You may scan a document or a picture with Canon Printers, which allows you to preserve an electronic copy of them. These files may also be promptly shared with others through email. You may be wondering how I get my Canon printer to scan to your PC. This guide might be of help
How do I scan from my Canon printer to my computer?
You must finish the process in two steps if you want to know how to get my Canon printer to scan or how to scan from my Canon printer to my computer. Let’s have a look at a few of them:
Phase 1: Setup the Canon Printer for Scanning
- You may scan a document if you have a Canon all-in-one printer model. Other Canon Printer models may also be used to scan; however, verify the printer’s user manual to guarantee that it can scan.
- If you’re wondering how to get my Canon printer to scan to my computer, connect it to your computer. Almost all Canon printers with scanning capabilities can also connect wirelessly through a touch-screen panel. However, you may need to use a USB connection to connect the printer to your computer.
- Turn your printer on. To turn on the printer, connect the power adapter to an electrical socket and click the power button on the printer.
- Lift the scanner’s lid and look for the scanner’s glass base.
- On the scanner tray, place the document or picture. By looking at the sign on the tray, you may figure out how to insert the paper.
- Refer to the Canon Printer user manual if you can’t figure out how to use the scanner.
- Place the paper in the scanner with the facing down. Examine the marks on the glass base. These indicate where the document should be placed in the scanner.
- Close the scanner cover and make sure it’s secure.
Phase 2: Run a computer scan
- To access the Start menu, press the Windows key on your keyboard.
- At the top of the Start window, choose the “Windows Fax and Scan” option.
- In the Fax and Scan box, go to the top-left corner and choose “New Scan.”
- Make sure the scanner is in working order. Click Change and pick your Canon Printer if you’re using anything different.
- Click the “Profile” drop-down box to choose a document type.
- In the drop-down box, choose the document type (for example, Photo).
- You can simply add a colour to the document by clicking on the colour format option on your computer
- Click the “File type” drop-down box to choose a file type (PDF or JPG).
- You may also adjust any other parameters on the website and look for a document preview.
- To scan the document, go to the bottom of the window and click Scan. Open Start and go to File Explorer if you need to search the scanned file. Then, on the left side of the window, click on Documents. Finally, open the scanned file by double-clicking the scanned documents folder.
- If you don’t know how to scan a document from a Canon printer to email, open your preferred email account, write an email, and upload the scanned document using the manner described above.
How do I scan on the Canon Pixma printer?
- Check to see whether your Canon printer is capable of scanning. Other printer models can scan, but you’ll have to check the printer’s manual or product page to see whether that’s the case.
- Make a connection between your printer and your computer. Most Canon scanner printers can connect wirelessly through a touch-screen panel, but you may need to use a USB connection to connect your printer to your computer.
- Download the printer drivers and utilities and install them. You can install the drivers for your printer using the CD or DVD that comes with it. The IJ Scan Utility is included with the printer drivers and may be used to scan documents.
- If required, turn on your printer. Turn on the printer by pressing the “On” button. Make sure the printer is connected to a functional power source if it won’t switch on.
- Activate the scanner. Lift the scanner’s lid to reveal the scanner’s glass bottom.
- Place your paper in the scanner face down. Look for an arrow in the document’s back-left corner and align it with it. The top and left sides of the glass should be aligned with your paper.
- Close the cover of the scanner. Before scanning your paper, double-check that it is securely closed.
Why can’t I scan from my printer to my computer?
There are a variety of reasons why your Canon printer will not scan to your computer. You can troubleshoot it and figure out why my Canon printer won’t scan to my computer by following these steps: Here are some examples of what you can do:
- For a few minutes, restart your computer and switch off your scanner.
- Turning the scanner off and unplugging the power cord will also do a thorough hardware reset.
- If you have a new Canon Printer, incompatibility with the operating system may cause the Canon Printer to fail to scan. As a result, it is strongly advised that you install the most recent version of the operating system on your computer.
- If you have switched to a new operating system, such as Windows 10, make sure the printer/scanner driver is up to date.
- Make that all wires, including the USB cord, are correctly attached.
- If you’re using a wireless network, make sure the Canon Scanner is also linked to the same network.
- Make sure your Canon Scanner’s device driver is up to date.
- Make sure your computer isn’t infected with malware or viruses. They might cause your Canon Scanner to malfunction.
How do you scan on a Canon Tr4500?
Place papers of the same size in the ADF while scanning two or more documents.
- Check to see whether your scanner or printer is switched on.
- Items should be placed on a platen or ADF. Start the IJ Scan Utility to position the originals (scanning from a computer).
- Select Auto. Scanning begins.
How to scan a document from Canon Printer to email?
If you need to scan a document from a Canon printer to an email account, start by following the instructions outlined above. Then, when you’re ready to send an email, upload the scanned picture from its position on your laptop and attach it to the email.
Simple ways to scan on the Canon Pixma Mg3600?
Putting things on the platen (Scanning from computer) The thing must be relocated.
- Open the IJ Scan Utility program to begin.
- Make sure the margin in Settings (Document Scan) is appropriate, then click the Set button for size/resolution and dismiss the window after it’s done.
- Then choose Document. Scanning begins.
How do I scan from my Canon Printer to my computer (windows 10)?
Check to see whether your scanner is connected to your computer through USB and if the USB scanner driver is loaded.
- Arrange the papers in a logical order.
- Press [SCAN] repeatedly to choose USB SCANNING>.
- tab the [Start] button on your keyboard to begin.
If you are requested to launch an application, choose “MF Toolbox Ver4.9.” The way the scanned document is handled is determined by your preferences.
When the scanning is complete, a folder with the scanning date will be created in the [My Pictures] folder in the [My Documents] folder, and your document will be stored in this folder.
Conclusion:
Using the techniques outlined in this article, you may scan any document or picture with your Canon Scanner, convert to the chosen file format, and save to your computer for future use. Do not hesitate to scribble your thoughts or queries in the comments area. You may also subscribe to the blog and like and share the posts.