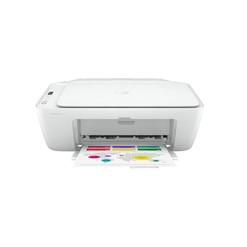
HP original manual can be difficult to understand. In this article with the video embedded on it would show you how to connect HP Deskjet 2700 to Wi-Fi network. We are using HP DESKJET 2710E to be precise. You can print, scan and copy with the HP Desk Jet 2700 All-in-One Wireless Inkjet Printer. It comes with built-in WiFi, so you can use it from any room in your home without needing to plug it into your computer. It has a print resolution of up to 1200 dpi, so you’ll get sharp text, bold blacks and crisp colour images with every print. Enabled with HP+ The cloud connected Desk Jet 2710e is enabled with HP+, which gives you extra printer benefits, such as automatic detection and fixing of connection issues. This makes the printer more up-to-date and secure. You even get more advanced options through the HP Smart app on your phone, such as easy multi-page document scanning, mobile fax and productivity features. Includes 6-month HP Instant Ink trial Thanks to the Instant Ink trial that comes with HP+, you can save up to 70% on original HP Ink and up to 50% on toner. Cartridges are automatically ordered by your printer when you are running low and delivered to your door. Plans start from 99p per month for 15 pages. The service works on how many pages you print, not how much ink you use. Choose between 15, 50, 100, 300 or 700-page monthly plans – unused pages roll over to the next month.
Now connecting your HP Deskjet 2700 printer to wifi will allow you to print directly from any compatible device or operating system that’s on the same network. In order to connect your printer, you’ll need to use your computer, smart phone or tablet to go through the setup process, which we’ll explain below in detail!
Step 1: Turn on the printer
Before you can connect your printer to Wi-Fi, you’ll need to power it on. The first time you switch on your HP printer it will perform a brief self-test; when that’s complete, press Next at the top of your screen. You’ll be asked for some general information about your printer, including whether or not it should print black and white or color documents by default. After making your selection, select Next. Your printer will ask if you want set up wireless connectivity; make sure that option is selected and then select Next. If your model doesn’t have an option for wireless connectivity, skip ahead to Step 4 and choose wired setup instead.
Step 2: Download HP SMART app from your phone
In order to connect your printer to Wi-Fi, you’ll need HP SMART app from either Google Play or Apple’s App Store. For Android users, you’ll want to use HP SMART APP AND HP Print for Android; for iPhone users, you can use HP ePrint & Scan. Both apps are free and both offer easy setup instructions for connecting your phone and printer wirelessly. There are some differences between how these two programs work but in most cases it doesn’t matter which one you choose—just pick whichever is available on your phone first and download it.
Step 3: Search for available printer and select your printer from the list
After clicking Next, you will be prompted with two options: ‘Select your printer from the list’ or ‘Type in your printer’s network settings’. You can select your printer from one of these two options. If you select, select your printer from list then click on Start Searching! and wait for it to search for any printers that are connected. Select your HP Deskjet 2700 series wireless printer after it shows up in window and then click Next. If you know how to connect HP wireless printers without using computer, then type in its wireless name SSID, security settings and password on next screen if not already added.
4, To connect the printer to WI-FI network, put the Wi-Fi details which is the WI-FI details click continue button.
5, Turn up Bluetooth ( Press allow to enable Bluetooth on)
6, HP SMART app automatically searches the printer.
7, Once found it will automatically prepare the printer and access the network.
8, Press information button (for security proximity).
9, Now the Printer is prepared! This means your printer is now connected to Wi-Fi network.
10, Finally, printer connected to Wi-Fi network IP address obtained (Blue light becomes steady and it will show the notification on your mobile device).
11, If you already have HP account you can setup. If not create, or skip. Set up completed.
12: You can now complete the alignment, Print a test page, Wireless network report and printer configuration report
Print a test page to make sure that you are connected to your network. On your computer, smart app navigates through System Preferences and choose Print & Fax or Printers & Scanners and copy. Navigate through printers and choose your HP printer. Now go back one screen and you should see an option for Print Test Page. Click on it, select your printer (if it is not already highlighted) and click print. If no errors come up, you are ready for printing!
Conclusion
With so many options available, connecting your HP 2700 printer to Wi-Fi can be a confusing process like I said at the beginning. However, if you follow these instructions, you’ll have your wireless printer connected in no time. Please comment, like, share and subscribe to the blog. You can also check out Vinneltv YouTube channel for various printer tutorial.