How To Use Tiny Scanner To Scan Document: Many people want to be able to do more with their phones to simplify their life at times and increase their productivity. One of these conveniences is scanning with your mobile phone and printing it with your home printer. Allow me to recommend a simple program that will handle this task for you without causing you any concern. This application is TINY SCANNER. I have used this app and done a video about this on my Youtube channel Vinneltv and the link to the video is embedded with this article.
Tiny Scanner is also a free application on Google’s Android operating system (play store) that can help you to scan documents with the camera on your device. You also have the Tiny Scanner Pro app which is not free of charge.
This app converts scanned documents to PDF format, with minimal editing options included for the best results. The conversion is done automatically without stress
One of the major advantages of Tiny Scanner over taking images with the phone’s camera is that it instantly converts the documents to PDF files and can be saved for future use too.
While it was meant to scan papers, it may also be used to scan photographs, receipts, and tickets.
Tiny Scanner only requires a few permissions, all of which are necessary for the application to function properly:
- Photos/Media/Files
- Camera
Purchases are made within the application.
The program itself is quite simple to use. It comes with two modes of operation: scanning with the camera or picking an image from the device’s memory.
Selecting the first option opens the camera menu, which you may use to scan a document. The only option available during this step is to switch on or off the flash.
You can change the page size format and the area of the photo that will be converted to a PDF document in the following stage.
The following step provides control over the output. You can output your image in grayscale, color, or black and white. Additionally, the contrast can be adjusted using dots presented on the same page.
Once satisfied, give the document a name and save it to the device.
The final screen allows you to share your work. Numerous features are reserved for the Pro version, but others, most notably email, are not.
Dropbox, Evernote, and OneDrive are all supported by the application but are only available to Pro customers.
While the program’s interface lists all PDF documents made by Tiny Scanner, you may also open them directly using a file explorer. The documents are located in TinyScan > Documents.
Settings
Among other things, the settings allow you to modify the default options. There, for example, you can modify the default page size and processing (black and white, color, grayscale, photo, last filter).
The app can be secured with a passcode to prevent unwanted access. It only allows four digits, implying that it provides only rudimentary protection.
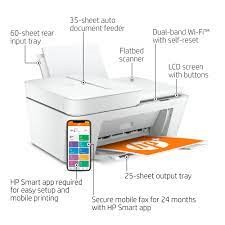
Also Read: HOW TO SETUP HP DESKJET 2755 PRINTER TO WIFI
Another item in the settings menu allows you to activate Wi-Fi connectivity. Essentially, it enables you to access the document storage through Wi-Fi from other devices, such as a PC or laptop.
More about the Tiny scanner app
Tiny Scanner is a handy Android app. It may be advantageous to scan travel documents, meeting papers or whiteboard content, receipts, and a variety of other items while on the fly.
Now that you’ve learned a little about this scanner, allow me to walk you through the process of using it to complete your tasks.
Now, allow me to walk down to your local toy store. If you have, then proceed with the next instructions.
How To Use Tiny Scanner To Scan Document
- Visit the Google Play Store and search for “TINY SCANNER.”
- Once you’ve downloaded this software, double-click it to open it.
- Accept all applicable terms and conditions or decline if you are dissatisfied with their terms.
- Once accepted, grant all permissions requested by the app on your mobile device.
- After that, the default page provides you with two methods for scanning your documents: gallery or camera.
- Take a photograph of the document you wish to scan.
- Customize your desired changes to the scanned document and click OK.
- After clicking OK, a preview of your paper is displayed. You can alter the graphic quality.
- Once satisfied, click Save. And you’ve accomplished it.
- On the image page, you can specify which images to include in the document. You can either add your signature or share it with peers.
- If you wish to scan additional documents, click the plus sign and repeat the process.
- That concludes your scanning using your mobile phone.
After scanning, some users may wish to print their documents. However, how is this accomplished? With the following steps, I believe this could be accomplished easily.
- To print from the app, you must be a premium user.
- once you are upgraded to the premium pages, you can then select print and chose the setting to be printed, and then get it printed out for you
- Once completed, select the desired printer to use or your home printer, and this will complete the process.
Conclusion:
I’m sure you loved it thoroughly and that it makes sense to you. Why not share and like this page so that others can benefit from the simple procedures as well without having to log in to their laptop or computer everywhere with them? Don’t forget to subscribe to this blog to receive additional information about technology and a variety of other topics.